Zoom Hosting Instructions
This document covers how to start and Host a Zoom meeting. Please follow these links to learn more about: Scheduling Zoom meetings, Troubleshooting Audio/Video in Zoom meetings or our
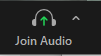
2. Check your Audio Settings: at the bottom left corner of the Zoom app, click the up arrow on the Microphone icon to choose from all available Microphone and Speaker options on your system (These options will vary depending on your specific setup).
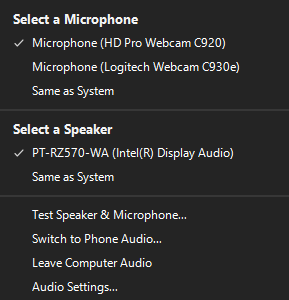
- Once you have selected the Microphone you wish to use, you can see if it works by looking at the Microphone icon. If you talk and see a green meter, then you have audio
- By clicking on this icon, you can mute and unmute yourself as needed during the meeting.
For more information on our recommended Audio and Video settings in the classrooms, please see this
For more information on our recommended Audio and Video settings in the classrooms, please seethis
click on the participants icon to Mute, Unmute, Edit Names, or even remove a participant from the meeting. You can also give participants the ability to record the meeting, or assign someone as a co-host during the meeting.
-
[ Chat
you can text chat, share links, and even share files with individuals or even the entire group in your meeting by clicking on the Chat icon. Individuals by default can also have private conversations without the host during the meeting.- If you want to share with one specific individual, be sure you choose their name from the drop down menu “To:” before sending.
- If you wish to turn off Chat for your meeting: click on the three dots to the right of the file share option and choose “Host Only” under Participants Can Chat With.


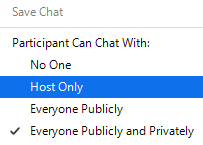
1. It is advised that you do not completely disable text chats, should the participant have technical issues with their mic or camera.
-
It is important to note and to let participants know if you are recording the meeting the Host will receive a full transcript of all Chats (Including private chats the host was not included in) once the meeting ends.
](http://griff.vn/Recording)

- If you choose “Screen 1” participants will see everything on your screen until you end screen share. This makes it very handy when sharing a PowerPoint and moving to another example like a streaming video.
- If you plan on showing a streaming video, be sure to choose the “Share computer sound” on the screen share menu.
- This is important to note if you have your email or grade books open that participants will see it if you see it.
- Sharing a single Program or App like PowerPoint is incredibly handy, but remember, if you choose this option and leave the PowerPoint to show another example, you will need to change your sharing option for them to see anything other than your PowerPoint.
- Whiteboard is a nice option for annotation or quick drawn examples
- Advanced Tab: you can also share a small portion of your screen or a second camera like a document camera via the options under the Advanced Screen Share tab.

- To record, simply push the Record icon.
- You can pause or stop the recording at any time. If you plan to record the entire meeting, you do not have to press stop before clicking “End Meeting for All”. The recording will not finish until the meeting has ended.
- When the meeting has been ended by the Host, the video processing screen will appear. When the video is done processing the folder containing your recording and chat text transcript will open automatically. If you wish to make this recording available to others, simply upload the MP4 video file to the location you wish. It will be titled Zoom_01, so you may want to change the name before upload the file.
- If you wish to upload this to your class, please upload the video file to your Panopto folder for your Canvas course, Not directly to Canvas.
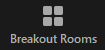
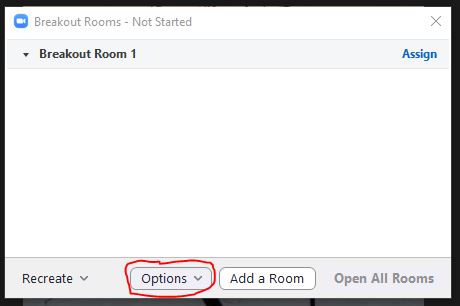
- Click the Breakout Rooms icon, from here you can choose:
- Automatically Assign Groups: you simply need to choose how many rooms total and Zoom will group participants at random.
- Click “Create Rooms” when you are ready to start.
- Participants will need to click the popup on their end to join the group.
- Manually Assign Groups: If you would prefer to put specific participants together, you can choose whom is in each group.
- Click “Create Rooms” when you are ready to start.
- Participants will need to click the popup on their end to join the group.
- Once you have created your groups the Host can join and leave individual groups to answer questions or just listen in by clicking “Join Group”
- Groups can click “Ask Host a Question” to get your attention to join their group.
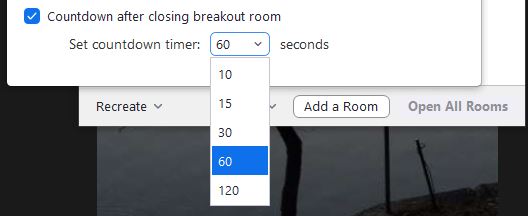
- When the exercise is complete, you can “Close all Groups” to rejoin all the participants into the Zoom meeting. This will start a countdown to let participants know the rooms are about to close.
[Once you have created the rooms, from the options drop down
you can choose 5, 10, 30, 60 and 120 seconds for the countdown.

- If you recorded this meeting, now is when you will see the Recording processing menu.
- If on a laptop, do not close the lid until this is complete. If you close the lid early, your video may be lost.
- If on a desktop, do not log off until this is complete. If you log out early, your video may be lost.
[